Best AI YouTube Thumbnail Makers for Beginners (2026)

Your thumbnail is often the first thing someone notices before deciding whether your video deserves a click.

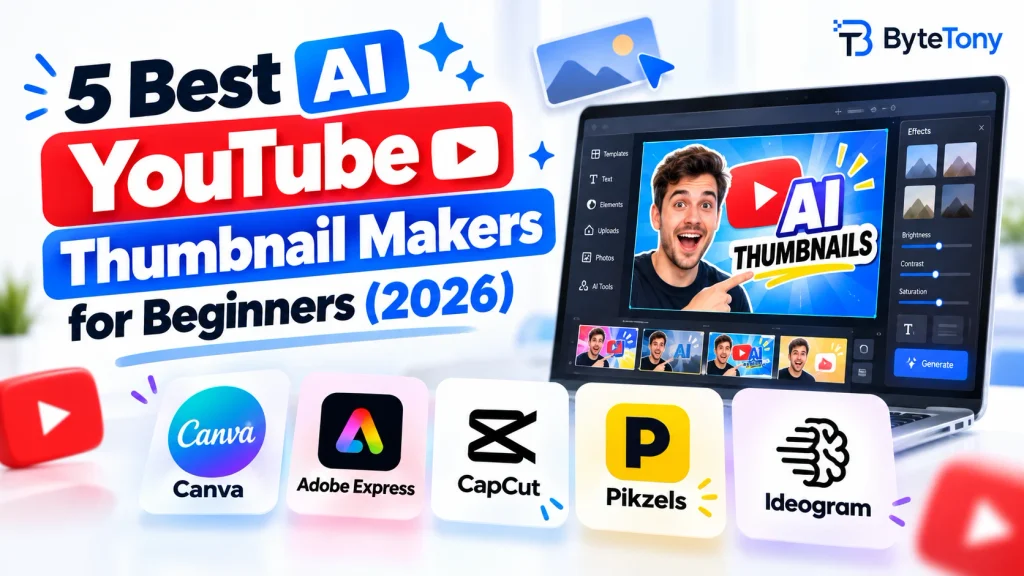
Best AI YouTube thumbnail makers for beginners including Canva, Pikzels, CapCut, Adobe Express, and Leonardo AI

It has to communicate an idea in seconds, remain readable on a small screen, compete with dozens of other videos, and still look good even if you have little or no design experience.

That sounds like a lot of pressure for one image.

YouTube says that half of all channels and videos have an impressions click-through rate somewhere between 2% and 10%, although new videos, new channels, and videos with fewer than 100 views can fall well outside that range.

A good thumbnail will not guarantee views, but it can make the difference between someone noticing your video and scrolling past it.

Fortunately, you no longer need advanced Photoshop skills to create one.

An AI YouTube thumbnail maker for beginners can help with templates, backgrounds, subject cutouts, image generation, layout, and even complete thumbnail concepts. The important part is choosing a tool that matches how you actually work.

This guide compares five beginner-friendly options:

  • Canva Magic Studio
  • Pikzels
  • CapCut
  • Adobe Express
  • Leonardo AI

You will also learn what each tool is best at, where the free plans become limiting, which option I recommend for most beginners, and how to create your first thumbnail in a simple six-step workflow.

If thumbnails are only one part of your content workflow, you can also explore these best AI tools for content creators in 2026.

Note: This article may contain affiliate links. If you buy through them, we may earn a small commission at no extra cost to you.


How I Chose These Tools

This is a research-based comparison rather than a hands-on benchmark.

Pricing, plan limits, and important feature details were checked against official sources in August 2026. Where a detail could not be confirmed reliably, I have avoided treating it as fact.

I used four main criteria.

1. A usable free option or real free trial

A beginner should be able to understand how a tool works before making a meaningful financial commitment.

That does not mean every tool on this list has a permanent free plan, but there should be some realistic way to evaluate it first.

2. Beginner-friendly workflow

The tool should not require professional design experience, complicated layer management, or hours of tutorials before you can create something usable.

3. YouTube-ready output

A good thumbnail tool should make it easy to work in a 16:9 format and export an image that fits YouTube’s current thumbnail requirements without forcing beginners to understand technical image settings first.

4. Reasonable upgrade path

For most beginners, I prefer tools with an entry paid plan around $20 per month or less.

Pikzels is the main exception. Its starting paid tier is considerably more expensive, but I included it because it represents a different category: it is designed specifically for YouTube thumbnails rather than being a general design or image-generation tool.

That difference is useful to understand before choosing.


The 5 Best AI YouTube Thumbnail Makers for Beginners

1. Canva Magic Studio

Best for: Complete beginners

Free plan: Yes

Starting paid plan: Canva Pro — US$180/year for one person at the time of checking

Canva is the easiest recommendation for someone who has never designed a thumbnail before.

It is a browser and mobile design platform built around drag-and-drop editing. YouTube thumbnail templates already use the correct aspect ratio, so you can start with a finished layout instead of creating a blank canvas and figuring everything out yourself.

Magic Studio is Canva’s collection of AI-powered features rather than a separate product. Depending on your plan, it can help generate images and designs, edit existing images, remove backgrounds, resize content, and automate other parts of the design process.

Why Canva is good for beginners

The biggest advantage is not any single AI feature.

It is the fact that Canva removes decisions.

You do not need to choose a canvas ratio, build a layout from scratch, search for separate fonts, or learn professional design software before producing your first thumbnail.

Choose a YouTube thumbnail template, replace the image and text, adjust the colors, and export.

That is enough for many new creators.

Canva Free currently includes more than 1.6 million templates, millions of photos and other assets, 5GB of cloud storage, and a limited AI allowance.

At the time of checking, Canva lists up to 200 uses of Standard AI tools or up to 20 uses of Premium AI tools on the free plan, depending on which tools you use.

Where Canva Free becomes limiting

Some of Canva’s most convenient features are part of Pro.

These include tools such as background removal and Magic Resize, along with greater access to premium templates, stock assets, and AI features.

There is also a creative downside to templates: if you use a popular template without changing much, your thumbnail may look similar to designs other creators are already using.

The solution is simple.

Treat templates as starting points rather than finished thumbnails. Change the image, colors, typography, composition, and wording until the design feels like your channel.

Pros

  • Very easy to learn
  • Useful free plan
  • Huge template library
  • Browser and mobile access
  • YouTube thumbnail layouts are ready to use
  • Combines AI features with normal design tools
  • You can create the entire thumbnail in one app

Cons

  • Some of the best editing tools require Pro
  • Free AI usage is limited
  • Popular templates can look generic if you barely customize them

Why it belongs on this list

Canva offers the lowest-friction path from “I have never designed anything” to a finished YouTube thumbnail.

For most beginners, that matters more than having the most advanced AI generator.


2. Pikzels

Best for: Frequent YouTube creators who want AI to build most of the thumbnail

Free plan: No permanent free plan; free trial available

Starting paid plan: Premium — $40/month or $28/month when billed annually at $336

Pikzels approaches thumbnails differently.

Canva gives you design tools.

Pikzels tries to give you the thumbnail.

It is built specifically around YouTube packaging rather than general graphic design. You can describe the thumbnail you want and let the system create a composed result instead of generating a raw image that still needs to be assembled somewhere else.

Its features include prompt-to-thumbnail generation, Personas, Styles, title generation, thumbnail analysis, and Recreate.

With Recreate, for example, you can provide a YouTube video link and use the existing thumbnail format as inspiration for a new version.

Personas are particularly useful for channels built around the creator’s face. You train a Persona using your photos and can then reuse your likeness across future thumbnail generations instead of uploading new reference images every time.

Why Pikzels is different

A normal AI image generator might create a dramatic image of a surprised person standing beside a laptop.

You still need to:

  • crop it
  • position it
  • add text
  • create contrast
  • choose a layout
  • make everything fit inside a thumbnail

Pikzels is designed to handle more of that composition for you.

For someone publishing several videos a week, saving those extra steps can matter.

Want to try Pikzels? Start your free trial here.

The main problem: price

Pikzels is easily the most expensive beginner option on this list.

The Premium plan currently costs $40 per month on monthly billing, or $28 per month when billed annually.

It includes 18,000 credits and advertises enough capacity for up to 1,800 thumbnails per year.

The Ultimate plan goes significantly higher.

Every action also draws from a shared credit system. A thumbnail, title, analysis, Persona, and Style do not necessarily consume the same number of credits.

That makes Pikzels much harder to recommend to someone publishing their first few YouTube videos.

Pros

  • Built specifically for YouTube thumbnails
  • Can generate composed thumbnails instead of raw images
  • Personas can speed up face-based designs
  • Recreate provides a fast way to explore successful thumbnail formats
  • Includes title-related tools as well as thumbnail generation

Cons

  • No permanent free plan
  • Much more expensive than Canva or Adobe Express
  • Uses a credit system
  • Overkill for occasional creators

Why it belongs on this list

Pikzels shows what a dedicated AI thumbnail maker can do that a general design platform cannot.

For beginners, I would not start here.

For creators publishing frequently enough that thumbnail production becomes a repetitive job, however, the time savings can make the price easier to justify.


3. CapCut

Best for: Creators who already edit videos in CapCut

Free plan: Yes

Paid pricing: Varies by region, platform, account, taxes, and current promotions

CapCut is primarily a video editor, not a thumbnail maker.

That sounds like a disadvantage — and in some ways it is — but it also creates one of CapCut’s biggest strengths.

Your video and thumbnail can live inside the same workflow.

You can select a frame from your footage, add text and graphical elements, make basic image adjustments, and avoid switching between several applications.

If you already use CapCut for editing, that convenience can matter more than having a dedicated thumbnail generator.

If you are new to the desktop version, see our complete guide on how to use CapCut on PC.

What you can do for free

CapCut’s free version provides enough traditional editing functionality to create a basic thumbnail using:

  • video frames
  • images
  • text
  • stickers
  • effects
  • filters
  • simple design elements

However, CapCut increasingly places advanced and AI-powered features behind paid plans.

Another complication is pricing.

There is no single global CapCut Pro price that every user will see. CapCut itself explains that subscription prices can vary according to country, platform, taxes, market conditions, promotions, and even account-specific offers.

The most reliable price is therefore the amount shown on the subscription or checkout screen for your own account.

When CapCut makes sense

Imagine that you have just finished editing your YouTube video.

The perfect facial expression already exists in frame 4,382 of your timeline.

With CapCut, you can use that frame without exporting it to another application first.

That sounds like a small advantage, but beginners often benefit from having fewer tools to manage.

If you are comparing broader editing workflows as well, our Descript review for YouTube beginners looks at another creator-focused approach to video production.

Want to try CapCut? Get started with CapCut here

Pros

  • Thumbnail and video can stay in one workflow
  • Usable free version
  • Works across desktop, mobile, and web
  • Easy to reuse frames from your own footage
  • Useful if you already know the interface

Cons

  • Designed for video first
  • Many advanced AI tools require a paid plan
  • Pricing is not consistent across every user or region
  • Less convenient for dedicated graphic design than Canva or Adobe Express

Why it belongs on this list

CapCut is not the best standalone thumbnail maker.

It is one of the best options when your goal is to reduce the number of applications involved in publishing a YouTube video.


4. Adobe Express

Best for: Beginners who want more layout control

Free plan: Yes

Starting paid plan: Adobe Express Premium — $9.99/month

Adobe Express sits between Canva’s simplicity and traditional professional design software.

It gives beginners templates and easy controls but also offers stronger typography, layout, image-editing, and Adobe ecosystem integration than many lightweight template tools.

Firefly generative AI is integrated into the experience, allowing you to generate or edit visual assets before finishing the actual thumbnail.

Why Adobe Express stands out

AI image generators are good at producing visual material.

They are less reliable at producing finished graphic design.

For example, you might successfully generate a cinematic image of a laptop exploding with colorful AI icons — but the generator may produce terrible text.

Adobe Express lets you separate those jobs.

Generate or import the visual first.

Then use normal design tools for:

  • text
  • alignment
  • spacing
  • fonts
  • backgrounds
  • overlays
  • branding

That is usually a better workflow than asking an image model to produce everything in one generation.

Free and paid plans

Adobe Express Free currently costs $0 and does not require a credit card.

It includes basic content creation tools, templates, stock assets, editing tools, and limited generative AI credits.

Adobe Express Premium currently costs $9.99 per month.

Adobe also offers Firefly Pro at $19.99 per month, which includes Adobe Express Premium, 4,000 monthly generative credits, and Photoshop on web and mobile.

Licensing considerations

Adobe places significant emphasis on commercially usable creative workflows around Firefly, but that does not mean you should ignore licensing entirely.

Commercial rights can depend on the exact asset, model, stock content, or subscription terms involved.

If a thumbnail is being created for a monetized business or channel, it is always sensible to check the current terms attached to the specific feature you are using.

Pros

  • Free plan available
  • Premium starts at a relatively low monthly price
  • Good text and typography controls
  • Strong combination of AI generation and traditional design
  • Useful Adobe integration
  • Browser and mobile workflow

Cons

  • More interface than some beginners need
  • Generative AI usage is limited by credits
  • Slightly less immediate than Canva for someone starting completely from zero

Why it belongs on this list

Adobe Express is one of the strongest Canva alternatives for people who want easy templates but also care about controlling the final design.


5. Leonardo AI

Best for: Custom illustrated, cinematic, gaming, and faceless-channel thumbnail art

Free plan: Yes

Starting paid plan: Essential — $12/month

Leonardo AI is different from every other tool above.

It is primarily an AI image and video generation platform.

It does not specialize in building complete YouTube thumbnails.

That distinction matters.

Leonardo can generate the dramatic visual that becomes your thumbnail, but you will usually want to add the final text, logo, and layout in another application such as Canva or Adobe Express.

Where Leonardo is strongest

Templates are useful, but templates can also make different channels look similar.

Leonardo gives you far more control over the visual style.

You can create:

  • cinematic portraits
  • gaming scenes
  • stylized characters
  • futuristic technology art
  • product concepts
  • exaggerated lighting
  • fantasy scenes
  • backgrounds that would be difficult to photograph

This makes it particularly useful for faceless channels and topics where custom artwork is more important than photography.

If you want to learn the broader workflow, see our beginner guide on how to create AI images for free.

The free plan

Leonardo currently provides free users with 150 Fast Tokens per day.

Token costs vary depending on the action and model, so 150 tokens do not translate into a fixed number of finished thumbnails.

Paid plans start with Essential at $12 per month and provide more tokens and private-generation features.

Important: understand the free-plan rights

This is the most important Leonardo detail for creators.

Free users can use Leonardo-generated images commercially.

However, free-plan generations are public, and Leonardo states that, as between you and Leonardo, Leonardo owns those assets.

That means a free user can use an image in a monetized YouTube thumbnail, but the image is not private or exclusively owned by that user in the same way as a private generation under an eligible paid plan.

This distinction matters if you are creating a visual identity that you want to keep exclusive to your brand.

For experimentation and individual thumbnail artwork, the free plan can still be extremely useful.

For important recurring brand assets, paid private generation may be more appropriate.

Pros

  • Free daily token allowance
  • Excellent stylistic range
  • Strong for gaming and faceless channels
  • Useful for generating visuals that do not look like stock templates
  • Commercial use is permitted on free generations

Cons

  • Not a complete thumbnail design tool
  • You usually need Canva, Adobe Express, or another app for text
  • Free generations are public
  • Leonardo retains ownership of free-plan assets under its current terms
  • Token usage varies by generation

Why it belongs on this list

Leonardo is not the easiest tool here.

But it gives beginners something the template-based options cannot: a practical way to create genuinely custom visual material without paying upfront.


Quick Comparison: The Five Tools Side by Side

ToolBest forFree optionStarting paid priceMain limitationBeginner ease*
Canva Magic StudioComplete beginnersYesPro: $180/yearBest tools require Pro5/5
PikzelsFrequent YouTube creatorsFree trialPremium: $40/monthExpensive for beginners4/5
CapCutExisting CapCut usersYesVariesVideo-first interface4/5
Adobe ExpressMore layout controlYesPremium: $9.99/monthAI credits are limited4/5
Leonardo AICustom AI artworkYesEssential: $12/monthRequires a second tool for final layout3/5

The beginner-ease ratings are editorial judgments based on how much a first-time user needs to learn before producing a usable thumbnail. They are not benchmark scores.

Pricing checked in August 2026. Prices and plan contents can change, so confirm the current amount on the vendor’s official pricing page before subscribing.


How to Make Your First AI YouTube Thumbnail in 10 Minutes

You do not need a complicated process.

For a first thumbnail, six steps are enough.

1. Pick one idea

Before opening any tool, answer one question:

What should someone understand when they look at this thumbnail for one second?

Not five ideas.

One.

That might be:

  • a shocked reaction
  • a before-and-after result
  • a surprising number
  • one product
  • one problem
  • one transformation

If the idea itself is unclear, better fonts will not save the thumbnail.

2. Choose a template or generate the image

If you are using Canva or Adobe Express, start with a YouTube thumbnail template.

Do not spend twenty minutes choosing one.

Pick a layout that roughly matches your idea and customize it.

If you are using an AI image generator such as Leonardo, describe the image specifically.

Instead of:

Cool AI YouTube thumbnail.

Try:

Close-up portrait of a surprised young creator looking directly at the camera, dramatic studio lighting, bright orange and deep blue background, strong contrast, slight low camera angle, subject positioned on the left side, right third of the image left clean for headline text, cinematic YouTube thumbnail composition.

The most important part is often the final instruction.

Leave room for the text.

A beautiful image is not necessarily a usable thumbnail.

3. Add your face or main subject

If your channel uses your face, make it one of the dominant visual elements.

Upload a clear photo and remove the background if your tool supports it.

Keep the subject large enough to remain recognizable when the thumbnail is displayed at a small size.

If you use Pikzels, its Persona feature can reduce repeated setup by allowing you to reuse a trained representation of yourself.

For a faceless channel, replace the face with the most important object or visual element.

The principle is the same:

Give the viewer one obvious focal point.

4. Add text as a separate layer

Do not rely on the AI image generator to render your final headline.

AI-generated text has improved, but it can still produce spelling problems, awkward letters, and layouts you cannot easily edit.

Add the final wording in Canva, Adobe Express, CapCut, or another design editor.

For most thumbnails, shorter is better.

Try to keep thumbnail text to roughly three to five words when possible.

For example:

Instead of:

I Tried Five Different AI Tools to See Which One Was Best

use:

WHICH AI WINS?

The video title can explain the rest.

The thumbnail only needs to create enough understanding and curiosity for the viewer to consider the click.

5. Check the technical requirements and export

For standard YouTube videos, YouTube currently recommends a thumbnail resolution of:

3840 × 2160 pixels

with a 16:9 aspect ratio.

The minimum width is 640 pixels.

YouTube currently recommends formats such as JPG or PNG.

Upload limits also depend on the device:

  • Mobile: up to 2MB for video thumbnails
  • Desktop: up to 50MB for video thumbnails

You also need a verified YouTube account to upload custom thumbnails.

Most dedicated templates handle the aspect ratio automatically, so beginners normally do not need to think about these numbers every time.

6. Run the squint test

Before uploading the image, shrink it dramatically.

Look at it at roughly the size you might see while scrolling on a phone.

Then squint.

Can you still identify:

  • the main subject?
  • the main emotion or idea?
  • the text?
  • what deserves attention first?

If not, do not automatically make the text larger.

First ask whether there are too many things competing for attention.

Removing one unnecessary element often improves a thumbnail more than adding another design effect.


Common YouTube Thumbnail Mistakes Beginners Make

Writing a full sentence on the thumbnail

The thumbnail does not need to explain the entire video.

That is what the title is for.

If the viewer has to stop and read a paragraph, the design is doing too much.

Use fewer words and make the main idea easier to understand.

Asking AI to generate the final text

AI image generators are best used for visual material.

Your design editor is better for typography.

Keeping text on a separate layer also means you can test a different headline in seconds without regenerating the entire image.

Making the thumbnail and video promise different things

A misleading thumbnail may create a click.

It does not create a satisfied viewer.

If the thumbnail strongly implies something that never happens in the video, people may leave quickly.

The goal is not simply to maximize clicks.

The goal is to attract the right click.

Using vague prompts

A prompt like:

Make an amazing gaming thumbnail.

leaves almost every creative decision to the model.

Describe:

  • subject
  • emotion
  • background
  • lighting
  • camera angle
  • color direction
  • empty space
  • composition

The more useful visual decisions you make in the prompt, the less random the result becomes.

Adding too many focal points

A face.

A laptop.

Five logos.

Three arrows.

A graph.

Four lines of text.

A giant circle.

All of them may be understandable individually, but together they compete for attention.

Ask what the viewer should notice first.

Then make everything else support that one element.

Ignoring small-screen readability

Your thumbnail may look excellent while filling your computer monitor.

That is not where many viewers will experience it.

Regularly zoom out while designing.

If the text, face, or main object disappears at smaller sizes, simplify the design.

Changing your visual style every video

Experimenting is normal when a channel is new.

Eventually, however, some consistency helps viewers recognize your videos.

You do not need identical thumbnails.

You can simply maintain recurring elements such as:

  • a small set of colors
  • one or two fonts
  • similar face treatment
  • consistent borders
  • recurring layouts

The goal is recognition, not repetition.


My Recommendation

Best overall for beginners: Canva Magic Studio

If you are starting from zero, use Canva.

It is not the most specialized AI thumbnail maker and it does not produce the most sophisticated AI artwork.

It simply removes the most friction.

You can start free, select a YouTube template, upload an image, add text, and export a finished thumbnail without learning professional design software.

That makes Canva the best overall choice for most beginners.

Best free option: Canva

CapCut, Leonardo, and Adobe Express all have useful free options.

But Canva offers the most complete free workflow for someone whose goal is specifically to create a finished thumbnail.

You do not need another application to add text or assemble the final layout.

Best dedicated AI thumbnail maker: Pikzels

If you publish frequently and want AI to handle more of the actual composition, Pikzels is the strongest specialist option in this comparison.

It is much more difficult to recommend at the beginning because of the price.

But if thumbnails eventually become a repetitive production task, the calculation changes.

If that matches your workflow, you can try Pikzels here.

Best if you already use CapCut: CapCut

Do not add another subscription just because an article tells you that you need one.

If your footage is already in CapCut and its tools are sufficient for the thumbnails you want to create, keep your workflow simple.

You can try CapCut here

Best for custom AI artwork: Leonardo AI

Leonardo is the strongest choice here when the visual itself matters more than the layout.

Generate the artwork in Leonardo, then finish the thumbnail in Canva.

That is one of the best $0 workflows in this article.

Just remember the rights distinction on Leonardo’s free plan: commercial use is allowed, but free generations are public and are not exclusively owned by you under Leonardo’s current terms.

Best Canva alternative: Adobe Express

Choose Adobe Express if Canva feels too template-driven or if you want more control over typography and layout while keeping the workflow beginner-friendly.


Frequently Asked Questions

Can I use AI thumbnails on a monetized YouTube channel?

Yes.

Using AI to create a thumbnail does not automatically make a channel ineligible for monetization.

YouTube’s monetization rules focus on whether the channel provides original and authentic value and currently restrict mass-produced, generic, repetitive, or otherwise inauthentic content.

The important distinction is between using AI as a tool and building a channel from low-effort content that looks mass-produced.

A creator can use AI during production while still contributing original ideas, commentary, editing, storytelling, education, or entertainment.

You should also check the commercial-use terms of the AI tool you use.

Being allowed to monetize a video on YouTube and having appropriate rights to the assets inside your content are separate questions.

Do I have to disclose that my thumbnail was created with AI?

Not simply because AI helped create the thumbnail.

YouTube currently lists using generative AI to create or improve things such as a video outline, script, thumbnail, title, or infographic as production assistance that does not itself require AI disclosure.

The situation changes when the actual video contains realistic AI-generated or meaningfully altered content that could mislead viewers about a real person, place, event, or situation.

In those cases, YouTube’s AI disclosure rules may apply to the video.

So keep these two questions separate:

Was AI used to help produce the thumbnail?

That alone does not trigger the disclosure requirement.

Does the video contain realistic synthetic or meaningfully altered content?

That may require disclosure.

Can I use someone else’s face in an AI thumbnail?

Be careful.

A thumbnail should not falsely imply that a person appears in, supports, endorses, or participated in a video when that is not true.

There may also be privacy, publicity, likeness, trademark, or other legal considerations depending on the person, image, context, and country involved.

AI does not remove those concerns.

If you are building a commercial channel, the safest approach is to use:

  • your own face
  • properly licensed images
  • people who have given permission
  • fictional AI-generated characters that do not impersonate a real person

When a real person’s likeness is central to the thumbnail, check the current YouTube policies and the applicable laws before publishing.

Can I make YouTube thumbnails entirely on my phone?

Yes.

Canva, Adobe Express, and CapCut all provide mobile workflows that can be used to create a finished thumbnail.

For a beginner, Canva is probably the easiest place to start because the template, image editing, text, and export process can all stay inside one app.

A browser-based AI generator can also be used from a phone, but moving between several tools is usually less comfortable on a small screen.


Final Thoughts

You do not need professional design skills to create a good YouTube thumbnail.

And you do not necessarily need the most advanced AI tool.

You need:

  1. one clear idea
  2. one obvious focal point
  3. readable text
  4. strong contrast
  5. a simple workflow you can repeat

For most beginners, Canva Magic Studio is the best place to start.

It is easy, the free plan is genuinely useful, and you can create the entire thumbnail without leaving the platform.

If you later publish often enough that thumbnail production becomes time-consuming, Pikzels becomes more interesting.

If you already edit everything in CapCut, there may be no reason to add another tool at all.

If you want distinctive AI-generated artwork, Leonardo AI plus Canva is a powerful free combination.

And if you want greater control over typography and layout, Adobe Express is one of the strongest alternatives.

The most important thing is not choosing the perfect tool before publishing your first video.

Choose one, create a thumbnail, shrink it down, run the squint test, and publish.

You can improve the system after you have something real to improve.

Leave a Comment

Your email address will not be published. Required fields are marked *

Scroll to Top