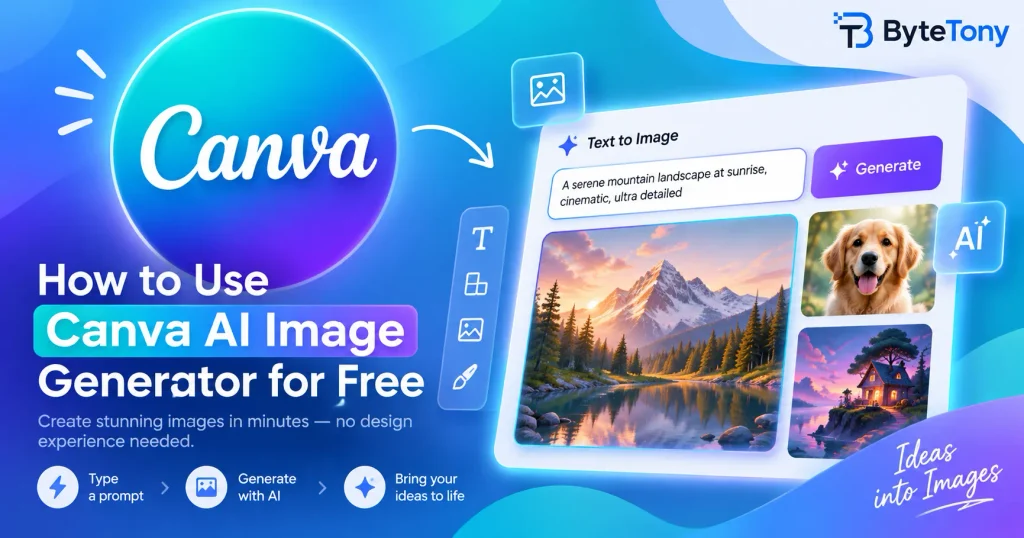
Canva AI Image Generator makes it easy for beginners to create custom visuals for blog posts, social media graphics, presentations, and YouTube thumbnails. You can describe the image you want, generate it with AI, edit it inside Canva, and download the finished design without switching between multiple tools.
In this beginner-friendly 2026 guide, you will learn how to use Canva AI Image Generator for free, write better prompts, understand the free-plan limits, and choose suitable alternatives.

Quick Answer: Can You Generate AI Images in Canva for Free?
Yes, Canva allows free users to try AI image generation.
Canva includes AI-powered features such as Magic Media, which can turn written prompts into images. Free access is limited, and Canva may change its usage limits or plan features over time.
For this reason, avoid relying on a fixed number of free generations unless you confirm it through Canva’s current official pricing or AI usage information.
Canva’s free AI tools can be useful for creating:
- Blog featured images
- Social media graphics
- Presentation visuals
- Pinterest pins
- YouTube thumbnail concepts
- Simple illustrations
- Creative design ideas
Canva may not be the best option for advanced professional artwork, complex scenes, large-format printing, or images that require precise details. However, it is one of the easiest AI image tools for beginners.
Table of Contents
What Is Canva AI Image Generator?
Canva AI Image Generator is a tool that creates images from written descriptions.
You enter a text prompt explaining what you want, choose a style or image format, and Canva generates several visual options.
For example, you could enter:
“A clean modern illustration of AI tools on a laptop screen, bright colors, simple background, beginner-friendly technology blog header.”
Canva will use the description to create images based on your instructions.
Once you choose a result, you can add it directly to your Canva design. You can then crop it, resize it, add text, apply filters, insert your logo, and combine it with other design elements.
The main advantage is convenience. You can generate, edit, and export the image without leaving Canva.
Magic Media vs Canva AI: What Is the Difference?
Canva offers several AI-powered features, and their names can be confusing for new users.
One of Canva’s main tools for generating images from text is Magic Media.
Magic Media
Magic Media is Canva’s text-to-image and text-to-video tool.
You can enter a prompt and generate images or videos directly inside the Canva editor. For beginners who only want to create an image from text, Magic Media is usually one of the easiest places to start.
Canva AI
Canva AI is the broader AI experience available across Canva.
Depending on Canva’s current interface and your account, it may help you create designs, generate images, write text, edit content, or build presentations.
In simple terms:
- Use Magic Media when you want to generate an image from a written prompt.
- Use Canva AI when you want broader assistance with creating or editing a design.
The exact location and names of these tools may change as Canva updates its interface.
Is Canva AI Image Generator Really Free?
Canva AI image generation can be used with a free Canva account, but access is limited.
The free plan may include access to selected AI tools and a limited allowance for AI generation. The exact limits can change depending on Canva’s current plans, policies, and account settings.
Canva Pro generally includes broader access to AI tools, premium templates, stock photos, videos, graphics, and brand features.
However, you do not need Canva Pro to follow this tutorial.
The free plan is usually enough for beginners who want to:
- Test AI image generation
- Create occasional blog graphics
- Design a few social media posts
- Experiment with different prompts
- Learn how Canva’s AI tools work
Start with the free plan before considering an upgrade.
What You Need Before You Start
Before creating your first AI image in Canva, prepare the following:
- A free Canva account
- A web browser or the Canva mobile app
- A design format, such as a blog banner or social media post
- A short description of the image you want
- A few minutes to test different prompts
You do not need Photoshop, advanced technical knowledge, or professional design experience.
How to Use Canva AI Image Generator for Free
Follow these steps to create your first AI-generated image in Canva.
Step 1: Open Canva and Start a Design
Go to Canva and sign in to your account.
Select Create a design, then choose the format you want to create.

Common options include:
- Blog banner
- Instagram post
- Facebook post
- Presentation
- YouTube thumbnail
- Pinterest pin
- Custom size
Choose the format based on where you plan to use the image.
A landscape format usually works well for WordPress featured images, website banners, and YouTube thumbnails.
A square format is useful for general social media graphics, while a portrait format is better for Pinterest and mobile-focused content.
If you are creating an image for a ByteTony article, a landscape design is usually the best starting point.
Step 2: Find Magic Media
After opening the Canva editor, look at the sidebar on the left side of the screen.
Select Apps, then search for:
- Magic Media
- AI Image Generator
- Text to Image
- Canva AI

Open the relevant image-generation tool when it appears.
Canva regularly updates its editor, so the tool may appear in a different location depending on your account, device, region, or current interface.
Step 3: Write Your First Prompt
A prompt is the written instruction you give to the AI.
Your prompt should clearly explain what you want Canva to create.
A useful prompt usually includes:
- The main subject
- The visual style
- The mood
- The purpose of the image
- Important objects or background details

Here is a simple example:
“A modern workspace with a laptop, coffee cup, and soft natural light, realistic style, for a technology blog header.”
This prompt tells Canva:
- What to create: a modern workspace
- Which objects to include: a laptop and coffee cup
- Which style to use: realistic
- Which mood to create: soft natural light
- Where the image will be used: a blog header
Clear prompts usually produce more useful results than short and vague prompts.
Step 4: Choose a Style
Canva may allow you to choose a visual style before generating the image.
Available options may vary, but common styles can include:
- Photography
- Illustration
- Digital art
- 3D
- Watercolor
- Minimal
- Cinematic
- Neon
- Concept art
Choose a style that matches the purpose of your design.
Use realistic or photography-based styles for professional blog headers and business content.
Use illustration or flat-design styles for tutorials, beginner guides, and educational content.
Use 3D or digital art for social media graphics, creative posts, and thumbnail concepts.
For a technology blog, a clean illustration style is often a reliable starting point.
Step 5: Choose the Aspect Ratio
The aspect ratio determines the shape of the generated image.
Choose the ratio based on where you will publish the image:
- Square: Instagram posts and general social media graphics
- Landscape: WordPress featured images, website banners, and YouTube thumbnails
- Portrait: Pinterest pins and mobile-first content
Choose the correct format before generating the image. This reduces the amount of cropping and resizing you need to do later.
Step 6: Generate the Image
After entering your prompt and selecting a style or aspect ratio, select the generate button.
Canva will create image options based on your description.

Review the results and select the image that best matches your idea. You can then add it to your design.
Do not worry if the first results are not perfect. AI image generators often require more than one attempt.
For example, instead of using a vague prompt such as:
“AI technology image”
Try a more specific prompt:
“A clean modern illustration of artificial intelligence tools displayed on a laptop screen, bright colors, simple background, beginner-friendly technology blog header.”
Small changes to the wording, subject, or style can significantly improve the result.
Step 7: Edit the Image Inside Canva
After adding the generated image to your design, you can edit it like any other Canva image.
You can:
- Crop the image
- Resize it
- Reposition the subject
- Add headings
- Add your blog name
- Insert icons or shapes
- Adjust brightness and contrast
- Add a background
- Apply filters
- Use brand colors
- Combine it with a template

This is one of Canva’s biggest advantages. You can generate the image and complete the full design in the same editor.
For example, you could add the following title to a featured image:
“Canva AI Image Generator Guide”
You could then place the ByteTony name or logo in a small corner of the design.
Add text manually inside Canva instead of asking the AI image generator to create readable text. This usually produces a cleaner and more professional result.
Step 8: Download Your Image
When the design is ready, select Share, then choose Download.
For most blog images, use:
- JPG: Better when you want a smaller file size
- PNG: Better for sharper graphics, screenshots, or designs containing text
Before uploading the image to WordPress, reduce its file size if necessary.
Large image files can slow down your pages, especially on mobile devices. Compressing the image can improve loading speed and user experience without creating a noticeable loss in quality.
Use a descriptive filename before uploading it, such as:
canva-ai-image-generator-guide.jpg
Avoid filenames such as:
IMG_4587.jpg
Canva AI Prompt Formula for Beginners
A simple prompt formula can help you create better images:
Subject + Style + Mood + Purpose + Important details
For example:
“A friendly robot helping a student learn online, colorful 3D illustration, bright and positive mood, for a beginner technology blog header, clean background.”
This works better than a vague prompt such as:
“AI robot image.”
The more clearly you describe the desired result, the easier it is for the AI to understand your intention.
Canva AI Prompt Examples
Here are several beginner-friendly prompts you can test.
Blog Featured Image Prompt
“A clean modern illustration of AI tools on a laptop screen, bright colors, simple background, beginner-friendly technology blog header.”
Social Media Graphic Prompt
“A colorful 3D illustration of a friendly robot helping a small business owner create social media content, modern workspace, clean composition.”
YouTube Thumbnail Concept Prompt
“A futuristic laptop displaying creative AI tools, glowing interface, high contrast, modern digital art style, attention-grabbing composition.”
Presentation Slide Prompt
“A minimal flat illustration of a team using artificial intelligence software, professional style, clean white background, suitable for a business presentation.”
Pinterest Pin Prompt
“A bright vertical illustration of a blogger creating images with AI tools, modern desk setup, soft colors, clean design, Pinterest-style composition.”
Tips for Writing Better Canva AI Prompts
Start With a Clear Subject
Avoid prompts that are too broad.
Weak prompt:
“Technology image.”
Better prompt:
“A beginner-friendly illustration of AI tools displayed on a laptop screen, clean modern style, bright colors.”
The second version gives Canva a clear subject and visual direction.
Add a Visual Style
Tell Canva what kind of image you want.
Useful style descriptions include:
- Realistic photo
- Minimal illustration
- Flat design
- 3D render
- Watercolor
- Cinematic
- Digital art
- Professional product photography
Choose one main style rather than combining several conflicting styles.
Mention the Intended Use
Explain where the image will appear.
For example:
- For a blog header
- For a YouTube thumbnail
- For an Instagram post
- For a presentation slide
- For a Pinterest pin
Mentioning the purpose can help the AI choose a more suitable composition.
Keep the Prompt Focused
Avoid placing too many objects and ideas in one image.
An overcrowded prompt might look like this:
“A robot, laptop, city, classroom, books, social media icons, charts, business team, and futuristic background.”
A clearer alternative would be:
“A friendly robot helping a student use AI tools on a laptop, clean modern classroom, colorful illustration style.”
A focused prompt usually produces a cleaner image.
Place Important Details First
AI tools may pay more attention to information near the beginning of the prompt.
Start with the main subject, then add the style, background, mood, and purpose.
For example:
“A laptop displaying AI design tools, clean minimal illustration, soft blue background, for a beginner technology blog.”
Avoid Generating Text Inside the Image
AI image generators often struggle to create accurate, readable text.
They may produce misspelled words, distorted letters, or meaningless symbols.
Generate the background or illustration first, then add the title manually using Canva’s text tools.
This gives you more control over:
- Spelling
- Font choice
- Text size
- Position
- Branding
- Readability
Common Canva AI Prompt Mistakes
Beginners often make the following mistakes:
- Using prompts that are too short
- Adding too many objects
- Requesting readable text inside the image
- Combining conflicting styles
- Choosing the wrong aspect ratio
- Expecting perfect hands, faces, or small details
- Asking for protected logos or copyrighted characters
- Using the first result without testing alternatives
AI image generation involves experimentation. Generate several options and adjust your prompt until you find a result that fits your design.
Canva Free Plan Limits You Should Know
Canva’s free plan is useful, but it does not provide unlimited access to every feature.
AI Usage Limits
Free users receive limited access to Canva’s AI-powered features.
The exact limits may change as Canva updates its plans, tools, or usage policies. Your allowance may also depend on the specific AI feature you use.
Check Canva’s official pricing and AI usage information when you need the current limit.
If you only create a few images occasionally, the free plan may be enough. Regular users may reach the limit more quickly.
Premium Elements
Some Canva templates, graphics, photos, videos, fonts, and design features are available only with Canva Pro.
Premium elements usually display a Pro label or icon.
To create a completely free design, make sure that every template, photo, graphic, and element you use is included in the free plan.
If your design includes a premium asset, Canva may require payment, a Pro subscription, or display a watermark during download.
Image Quality and Detail
Canva AI is useful for everyday digital content, but it is not perfect.
It generally works well for:
- Blog graphics
- Social media images
- Simple illustrations
- Presentation visuals
- Creative concepts
- Thumbnail backgrounds
It may be less suitable for:
- Large-format print designs
- Highly detailed professional artwork
- Precise product mockups
- Complex scenes containing many people
- Images requiring accurate text
- Images requiring perfect hands or faces
The results depend on your prompt, the chosen style, and the complexity of the image.
Can You Use Canva AI Images Commercially?
AI-generated images may be usable in commercial projects, but you must follow Canva’s current terms and any applicable licensing rules.
You are responsible for checking that your prompt, generated image, and final design do not violate another person’s copyright, trademark, privacy, publicity, or other rights.
Be especially careful when generating or using images containing:
- Copyrighted characters
- Famous logos
- Celebrities
- Real people without permission
- Protected brand elements
- Misleading visuals
- Content that may violate Canva’s policies
AI-generated outputs may also resemble images created for other users, so you should not assume that every result is completely unique.
If your final design includes Canva templates, stock photos, graphics, icons, or other library content, the relevant Canva content licensing rules may also apply.
Before using an AI-generated image in paid advertising, client work, merchandise, product packaging, or another important commercial project, review Canva’s current:
- AI Product Terms
- Content License Agreement
- Acceptable Use Policy
This article is for general informational purposes and is not legal advice.
What to Do When You Reach the Free Limit
If Canva tells you that you have reached your free AI limit, you have several options.
Option 1: Wait for Your Allowance to Reset
If you only use AI image generation occasionally, waiting for the allowance to reset may be the easiest option.
Canva may change how and when AI allowances reset, so check the information displayed in your account.
Option 2: Upgrade to Canva Pro
Canva Pro may be worth considering if you regularly create:
- Blog featured images
- Social media posts
- YouTube thumbnails
- Presentations
- Marketing graphics
- Client designs
A paid plan may provide broader access to AI features, premium templates, stock content, brand tools, and other design features.
However, beginners should not feel pressured to upgrade immediately.
Use the free version first. Consider upgrading only when Canva becomes an important part of your regular workflow and the free limits begin to slow you down.
Option 3: Try Another AI Image Generator
You can also use another free AI image tool when you reach Canva’s limit.
Popular alternatives include:
- Adobe Express with Firefly
- Microsoft Designer
- Ideogram
Each tool has different strengths, interfaces, free-plan restrictions, and licensing terms.
Canva AI Image Generator vs Free Alternatives
| Tool | Best for | Free access | Ease of use | Main advantage |
|---|---|---|---|---|
| Canva | Beginners and Canva users | Limited AI access | Very easy | Generate and edit designs in one place |
| Adobe Express with Firefly | Users who value Adobe’s commercial-use guidance | Limited free generations | Easy | Connected to Adobe’s design tools |
| Microsoft Designer | Quick social graphics and design concepts | Free access with limits | Easy | Fast design creation |
| Ideogram | Images containing more readable text | Free plan with limits | Medium | Often useful for text-focused image concepts |
No tool is the best choice for every project.
Canva is usually the easiest starting point when you want to generate an image and complete the final design in the same editor.
Adobe Express with Firefly may appeal to users who already use Adobe products or want clearer commercial-use documentation.
Microsoft Designer is useful for quick social media concepts, while Ideogram is worth testing when your image needs more accurate text generation.
Always check the current limits and terms of each platform before depending on it for regular or commercial work.
Best Uses for Canva AI Images
Canva AI Image Generator is especially useful for beginner-friendly digital content.
You can use it for:
- Blog post featured images
- Tutorial illustrations
- Social media graphics
- Pinterest pins
- Presentation slides
- YouTube thumbnail concepts
- Email newsletter visuals
- Website graphics
- Creative brainstorming
- Simple product concepts
For bloggers, Canva AI can help create more distinctive visuals instead of relying only on stock images that may appear on many other websites.
You can generate a custom background and then add your article title, logo, and brand colors manually.
When Canva AI May Not Be the Best Choice
Canva is easy to use, but it may not provide enough control for every project.
Consider another tool or professional design software when you need:
- Highly detailed artwork
- Large print-ready images
- Precise product photography
- Perfectly realistic people
- Accurate hands and small details
- Complex scenes
- Exact typography inside the generated image
- Advanced image-generation controls
- Protected logos or copyrighted characters
More advanced AI image tools may offer greater control over composition, style, and details, but they can also be more difficult for beginners to learn.
Common Canva AI Problems and Fixes
I Cannot Find Magic Media
Open the Apps section inside the Canva editor and search for:
- Magic Media
- Text to Image
- AI Image Generator
- Canva AI
If you still cannot find it, the feature may appear in another section of the current Canva interface or may not be available for your account, region, device, or plan.
My Image Looks Blurry or Distorted
Simplify your prompt and focus on one main subject.
Complex scenes with many objects are more likely to contain visual mistakes.
You can also try:
- Selecting a different style
- Removing unnecessary details
- Using illustration instead of photography
- Generating the image again
- Choosing a simpler background
Canva Does Not Follow My Prompt
AI image tools do not always follow every instruction perfectly.
Try the following:
- Put the main subject at the beginning
- Remove secondary details
- Avoid conflicting styles
- Shorten the prompt
- Use a different visual style
- Generate several new options
The Text Inside My Image Looks Wrong
This is a common limitation of AI image generators.
Generate the image without text, then add the title manually using Canva’s text tools.
This produces more accurate spelling and gives you control over fonts, colors, placement, and branding.
My Image Looks Too Generic
Add specific visual details.
Instead of:
“A blog image about AI.”
Try:
“A clean modern blog header showing a laptop with artificial intelligence tools, soft blue background, simple icons, beginner-friendly technology style.”
You can also specify:
- Camera angle
- Background color
- Lighting
- Illustration style
- Mood
- Intended use
- Amount of empty space
For example:
“A modern laptop displaying AI design tools, minimal illustration, soft blue background, subject positioned on the right, empty space on the left for a blog title.”
Recommended Canva AI Workflow for Beginners
Use this simple workflow when creating an AI image for your blog:
- Choose the final design size.
- Open Magic Media or Canva’s current AI image tool.
- Write a focused prompt.
- Choose the appropriate style.
- Select the correct aspect ratio.
- Generate several options.
- Choose the best result.
- Add the image to your design.
- Add text manually.
- Apply your brand colors and logo.
- Download the final design as JPG or PNG.
- Compress the image before uploading it to WordPress.
- Use a descriptive filename and alt text.
This process helps you create consistent visuals without requiring advanced design skills.
Final Recommendation: Is Canva AI Image Generator Worth Using?
Canva AI Image Generator is worth trying if you are a beginner, blogger, student, content creator, or small business owner.
It may not be the most advanced AI image generator, but it is one of the easiest tools to learn.
Its biggest advantage is that you can create the image, add text, customize the design, and export the final file in one place.
Canva is especially suitable for:
- Beginners who want a simple interface
- Bloggers who need featured images
- Content creators producing social media graphics
- Users who already create designs in Canva
- Anyone who wants to combine AI generation with manual editing
Start with Canva’s free plan and test several prompts.
If you begin creating visuals regularly and frequently reach the free limits, Canva Pro may become a practical upgrade. Until then, the free plan is enough to learn the process and create occasional designs.
Conclusion
Canva makes AI image generation accessible to beginners.
To create an image, start a Canva design, open Magic Media or Canva’s current AI image tool, enter a clear prompt, choose a style and aspect ratio, generate several options, and edit the best result inside the Canva editor.
The free plan is useful for testing the feature and creating occasional blog, social media, and presentation graphics. However, AI limits, premium elements, and plan features may change, so check Canva’s official information when you need exact details.
The best way to improve is through practice.
Start with one focused prompt, generate several images, and adjust the description until you get a result that matches your idea. Then add your title and branding manually to create a polished final design.
Frequently Asked Questions
Is Canva AI Image Generator free?
Canva allows free users to try selected AI image-generation features, but usage is limited. The exact allowance may change, so check Canva’s official pricing and AI usage information for current details.
Is Magic Media the same as Canva AI Image Generator?
Magic Media is one of Canva’s tools for generating images and videos from text. Canva AI is the broader AI experience available across Canva. The exact names and locations of the tools may change as Canva updates its interface.
How many AI images can I create for free?
Canva may change its free AI limits over time. The number of available generations can also depend on the tool and plan. Check the information shown in your Canva account instead of relying on an older fixed number.
Can I use Canva AI images commercially?
Commercial use depends on Canva’s current terms, the generated content, and any Canva library elements included in the final design. Avoid protected characters, logos, celebrities, and content that violates another party’s rights. Review Canva’s official terms before using images in important commercial projects.
Does Canva add a watermark?
AI-generated images themselves may not always contain a watermark, but designs using Pro templates, premium photos, or paid elements may display a watermark or require payment. Use free elements only if you want to download the design without purchasing premium content.
Why does my Canva AI image look wrong?
The prompt may be too vague, complicated, or focused on details that AI tools find difficult, such as hands, faces, small objects, or accurate text. Simplify the prompt, choose another style, and generate new options.
What is a good Canva AI prompt for beginners?
A useful beginner prompt includes the subject, style, mood, purpose, and important details. For example:
“A clean modern illustration of AI tools displayed on a laptop screen, bright colors, simple background, beginner-friendly technology blog header.”
What is the best free alternative to Canva AI?
Adobe Express with Firefly, Microsoft Designer, and Ideogram are popular alternatives. Adobe Express is useful for users who prefer Adobe’s ecosystem, Microsoft Designer is suitable for quick graphics, and Ideogram is worth testing when an image needs more readable text.